Posted on

How to dry your harvest

Drying your cannabis harvest is an essential step in the cultivation process. Proper drying is crucial for preserving the potency and flavor of your buds. In this blog, we’ll walk you through how to dry your cannabis harvest to ensure the best possible end product.

Materials you’ll need

Before you begin, make sure you have the following materials:

  • Clean, dry, and well-ventilated space (a separate room or closet)
  • String or wire for hanging
  • Clothespins or hangers
  • Hygrometer (optional, but helpful for monitoring humidity levels)
  • Small fan (optional, but helpful for increasing air circulation)

Step-by-Step Guide to Drying Your Harvest

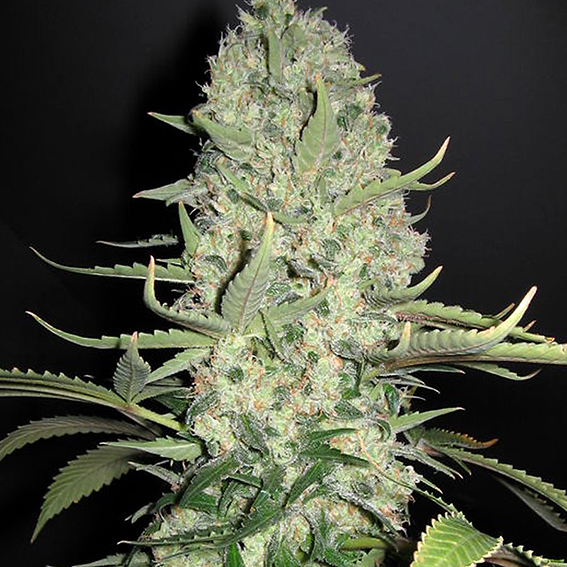
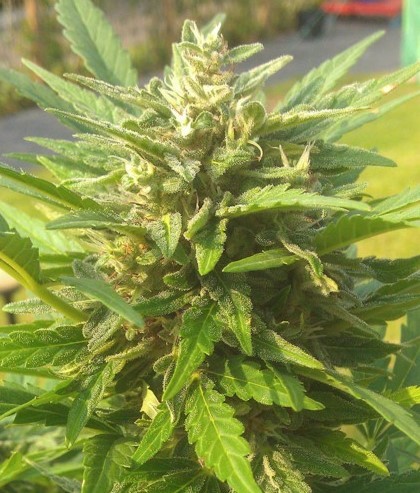
  1. Harvest your plants: Once your plants have reached maturity, it’s time to harvest them. Cut the plants at the base and remove the large fan leaves.
  2. Trim the buds: Use scissors or a sharp knife to trim any excess leaves, stems, or sugar leaves from the buds. You can also trim the buds before hanging them if you prefer.
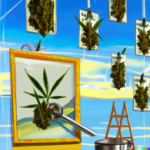
  3. Hang the buds: String or wire a clothesline in your drying space, and hang the buds upside down using clothespins or hangers. Make sure the buds don’t touch each other, and leave enough space between them for air to circulate.
  4. Monitor temperature and humidity: The ideal temperature for drying cannabis is between 60-70°F, with humidity levels between 45-55%. If the humidity is too high, you risk mold and mildew growth, and if it’s too low, the buds may dry too quickly.
  5. Increase air circulation (optional): If you’re concerned about humidity levels, you can use a small fan to increase air circulation. This will help prevent mold growth and promote even drying.
  6. Check on your buds: After the first 24 hours, check your buds daily. Gently squeeze them to check for moisture, and smell them to make sure they aren’t developing a musty odor. If you notice any mold or mildew growth, remove the affected buds immediately.
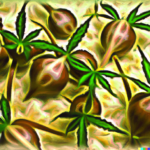
  7. Cure your buds: Once your buds have dried for about a week, it’s time to start the curing process. Place them in airtight containers like mason jars, and store them in a cool, dark place. Open the containers once a day for the first week to release any excess moisture, and then once a week after that.
  8. Enjoy your cannabis: After a few weeks of curing, your buds will be ready to enjoy. The curing process will continue to enhance the flavor and potency of your buds over time.

Final Thoughts

Drying your cannabis harvest is a crucial step in the cultivation process. By following these steps, you can ensure that your buds are properly dried and cured, resulting in the best possible end product. Remember to be patient and take your time, as rushing the drying process can lead to a less flavorful and less potent end product. Happy growing!

Posted on

When to harvest

When it comes to harvesting recreational cannabis, timing is everything. Harvesting too early can result in less potent buds, while waiting too long can lead to decreased potency and an increased likelihood of mold or mildew. In this blog, we’ll explore when to harvest recreational cannabis to ensure that you get the most out of your harvest.

Understanding the Flowering Cycle

Before we discuss when to harvest your cannabis, it’s essential to understand the flowering cycle of the cannabis plant. During the flowering cycle, the plant develops buds that contain the highest concentration of THC and other cannabinoids. The flowering cycle can take anywhere from six to twelve weeks, depending on the strain and growing conditions.

The flowering cycle can be broken down into three stages:

  1. Early Flowering Stage – During the early flowering stage, the plant will begin to produce buds. These buds will be small and will not have developed their characteristic aroma or taste.
  2. Mid-Flowering Stage – During the mid-flowering stage, the buds will begin to grow larger and develop their characteristic aroma and taste. This is the stage where the buds will start to become more potent.
  3. Late Flowering Stage – During the late flowering stage, the buds will be at their most potent. However, waiting too long to harvest can result in mold or mildew.

Signs of Harvest Time

Now that we have a better understanding of the flowering cycle, let’s look at the signs that your cannabis is ready to be harvested.

  1. Pistils Change Color – During the flowering cycle, the pistils (the small hairs on the buds) will change color. Initially, they will be white or cream-colored, but as the plant matures, they will turn orange or red. When the pistils have turned orange or red, the buds are ready to be harvested.
  2. Trichomes Change Color – Trichomes are the small, hair-like structures on the buds that contain the highest concentration of cannabinoids. When the trichomes have turned from clear to milky or amber, it’s a sign that the buds are ready to be harvested.
  3. Smell and Taste – When the buds have developed their characteristic aroma and taste, it’s a sign that they are ready to be harvested. This is a good indicator that the buds have reached their peak potency.

Harvesting Your Cannabis

Once you’ve determined that your cannabis is ready to be harvested, it’s time to get to work. To harvest your cannabis, follow these steps:

  1. Cut the branches – Use a sharp pair of scissors or pruning shears to cut the branches from the plant. Leave a few inches of stem attached to the buds.
  2. Remove the fan leaves – Use your scissors to remove the fan leaves from the branches. These leaves do not contain any significant amount of cannabinoids, and removing them will make the drying and curing process easier.
  3. Dry the buds – Hang the branches upside down in a cool, dry place with good ventilation. It’s important to keep the buds out of direct sunlight and to maintain a temperature between 60-70°F and a humidity level of 45-55%.
  4. Cure the buds – After the buds have dried for a few days, it’s time to start the curing process. Place the buds in an airtight container, such as a mason jar, and store them in a cool, dry place. Open the container once a day for the first week to release any excess moisture.

Conclusion

Harvesting recreational cannabis is a crucial step in the growing process. By understanding the flowering cycle and the signs of harvest time, you can ensure that your buds are potent and flavorful. Remember to be patient and take the time to dry and cure your buds properly. With a little bit of care and attention, you can

Posted on

Germinating seeds method 1

Germinating cannabis seeds is the first step in growing healthy and robust plants. This process is crucial to ensure that your cannabis seeds sprout and grow into healthy plants. In this post, we’ll explore the step-by-step process of germinating cannabis seeds.

Step 1: Gather Your Supplies

To germinate your cannabis seeds, you will need the following supplies:

  • Cannabis seeds
  • Distilled water
  • Small container
  • Paper towel
  • Ziplock bag

Step 2: Soak the Seeds

The first step in germinating cannabis seeds is to soak them in distilled water for 12-24 hours. This will help to soften the outer shell of the seed, which will make it easier for the seedling to emerge.

To soak the seeds, fill a small container with distilled water and place the seeds inside. Make sure the seeds are fully submerged in the water. You can leave the seeds to soak for 12-24 hours.

Step 3: Prepare the Paper Towel

After soaking the seeds, prepare a paper towel. Moisten the paper towel with distilled water and wring out any excess water. The paper towel should be damp but not soaking wet.

Place the moist paper towel on a clean, flat surface, such as a plate or a clean countertop.

Step 4: Transfer the Seeds to the Paper Towel

Once the paper towel is ready, remove the seeds from the water and place them on the paper towel. Make sure the seeds are spaced out and not touching each other.

Fold the paper towel over the seeds to cover them completely. Place the paper towel with the seeds inside a ziplock bag and seal it. This will create a warm and humid environment that will help the seeds to germinate.

Step 5: Wait for Germination

Place the ziplock bag in a warm and dark place, such as a closet or a drawer. Check on the seeds daily to ensure that the paper towel remains moist. After a few days, you should start to see the seeds sprout and a small taproot emerge from the seed.

Step 6: Transplant the Germinated Seeds

Once the seeds have sprouted, it’s time to transplant them into soil. Carefully remove the germinated seeds from the paper towel and plant them in a small container filled with soil. Make a small hole in the soil and place the seed with the taproot facing down.

Cover the seed with soil, leaving just the top of the seed exposed. Water the soil and keep it moist, but not soaking wet.

Conclusion

Germinating cannabis seeds is a straightforward process that requires minimal equipment and preparation. By following these simple steps, you can ensure that your cannabis seeds sprout and grow into healthy plants. Remember to be patient, as it may take a few days for the seeds to sprout. Once your seeds have germinated, transplant them into soil and watch them grow into healthy cannabis plants. Happy growing!

Posted on

Photoperiod vs. Autoflower

Photoperiod and autoflowering are two different types of cannabis plants that have unique characteristics and growing requirements. In this post, we’ll explore the differences between photoperiod and autoflowering cannabis plants, and their respective advantages and disadvantages.

Photoperiod Cannabis

Photoperiod cannabis is a type of cannabis plant that requires a specific light cycle to enter the flowering stage. These plants will not start flowering until the daylight hours decrease to around 12 hours per day. This means that growers need to control the amount of light the plants receive to ensure they enter the flowering stage at the desired time. Typically, photoperiod plants require 12 hours of light and 12 hours of darkness during the flowering stage to produce high-quality buds.

Advantages of Photoperiod Cannabis

One of the advantages of photoperiod cannabis is that they typically produce larger yields than autoflowering plants. They also offer greater flexibility in terms of training and manipulation to increase yield or control plant structure. Additionally, photoperiod plants offer a wider variety of strains and genetic diversity to choose from, as they have been around longer and have been extensively bred for different characteristics.

Disadvantages of Photoperiod Cannabis

One of the disadvantages of photoperiod cannabis is that they require more time and attention to grow. Growers need to control the light cycle, and this can be challenging for novice growers. Additionally, photoperiod plants can take anywhere from 8 to 12 weeks to flower, which means the grow cycle is longer.

Autoflowering Cannabis

Autoflowering cannabis plants are a newer variety of cannabis that do not rely on a specific light cycle to enter the flowering stage. Instead, they automatically enter the flowering stage based on age, regardless of the amount of light they receive. This makes autoflowering plants a popular choice for novice growers or growers who don’t want to invest in additional equipment to control light cycles.

Advantages of Autoflowering Cannabis

One of the advantages of autoflowering cannabis is that they have a shorter grow cycle than photoperiod plants. They can go from seed to harvest in as little as 8 to 10 weeks, which means growers can produce more harvests in a shorter amount of time. Additionally, autoflowering plants tend to be more compact and require less space, making them an ideal choice for indoor growers or those with limited space.

Disadvantages of Autoflowering Cannabis

One of the disadvantages of autoflowering cannabis is that they generally produce smaller yields than photoperiod plants. They also have a limited selection of strains compared to photoperiod plants, as they are a newer variety and have not been bred for as long. Additionally, autoflowering plants cannot be manipulated in terms of plant structure or training, which may limit their yield potential.

Conclusion

In conclusion, both photoperiod and autoflowering cannabis plants have their advantages and disadvantages. Photoperiod plants are more established and offer a wider selection of strains and genetic diversity, while autoflowering plants offer a shorter grow cycle and require less attention. Ultimately, the choice between the two will depend on the grower’s needs, resources, and experience.

Posted on

Indica vs Sativa

Cannabis is a plant with several varieties, including cannabis sativa and cannabis indica. Both have unique characteristics that form the basis for growing and using these plants. In this blog post, we’ll explore the difference between cannabis sativa and cannabis indica, and examine their respective origin, effects, and applications.

The difference between cannabis sativa and cannabis indica

Cannabis sativa and cannabis indica are different varieties of the cannabis plant and have different properties and characteristics. Here is an overview of the main differences between the two.

Appearance

Cannabis sativa plants are generally taller and slimmer than cannabis indica plants. They have long, thin leaves and can grow up to 6 meters high. Cannabis indica plants, on the other hand, are shorter and wider, with broad leaves and a denser structure.

Growing conditions

Cannabis sativa plants thrive in warm and humid climates. They require a lot of sunlight and have a longer flowering time than cannabis indica plants. Cannabis indica plants, on the other hand, grow well in colder and drier climates. They require less sunlight and have a shorter flowering time than cannabis sativa plants.

Cannabinoids

Both plant types contain a variety of cannabinoids, the chemical compounds that are responsible for the different effects of cannabis. Cannabis sativa plants generally contain more THC, the psychoactive substance in cannabis that is responsible for the “high”. Cannabis indica plants, on the other hand, contain more CBD, a cannabinoid known for its therapeutic properties.

Effects

The effects of cannabis sativa and cannabis indica also vary. Cannabis sativa is known for its uplifting and stimulating effects. It can lead to an energetic, creative, and socially enhanced experience. Cannabis indica, on the other hand, has a more relaxing and calming effect. It can help reduce tension, improve sleep, and relieve pain.

Applications

The different effects of cannabis sativa and cannabis indica have led to different applications for each of the plants. Cannabis sativa is often used for recreational purposes and is associated with the creative and socially enhanced experiences it can provide. Cannabis indica, on the other hand, is often used for therapeutic purposes and can help reduce pain, anxiety, and sleep problems.

Origin of cannabis sativa and cannabis indica

Cannabis sativa and cannabis indica both have a long history of human use, and their origins can be traced back to different parts of the world.

Cannabis sativa is believed to have originated in equatorial regions of Central and South America. It has been cultivated for centuries for its fiber, which is used to make textiles, paper, and other products. Cannabis sativa has also been used for its medicinal properties, particularly in the treatment of pain, nausea, and other conditions.

Cannabis indica is thought to have originated in the Hindu Kush mountain range, which spans from Afghanistan to Pakistan. It has been used for centuries for its resin, which is rich in cannabinoids and has been traditionally used for its therapeutic properties. Cannabis indica has also been used for its sedative effects and is often used to promote relaxation and sleep.

Conclusion

In summary, cannabis sativa and cannabis indica are two distinct varieties of the cannabis plant, each with unique characteristics and properties. While they share some similarities, they differ in appearance, growing conditions, cannabinoids, effects, and applications. Understanding the difference between cannabis sativa and cannabis indica can help you choose the right variety for your needs, whether for recreational or therapeutic purposes.

Posted on

Growing autoflowers

Cannabis Ruderalis is a strain grown in cold climates and short summers. The plant adapted to the climate and flowers faster and even with more light then we are used to with the photoperiod strains who only flower when the days are shorter then 13 hours of light.

Indoor growing

Best is to put the lamps on 18 hours or more, so the buds can develop.

Never transplant an autoflower plant: their roots are to fragile and the transplant will shock them.

Outdoor growing

autoflower is extremely suitable for outdoor cultivation. Planted at the end of May means harvesting in mid-summer when the sun is at its strongest

Posted on

Presenting Euroseeds

Euroseeds is a collective of breeders presenting trustworthy and reliable genetics to the public at an affordable price. Organic Earth is one of their first distribution-points.

Feminised seeds

Euroseeds produce mainly feminised seeds. By making sure that only female plants are produced, each and every plant will give female flowers. This ensures higher yield as the available growing space is used in the most productive way possible by eliminating the growth of male cannabis plants. Growing nice buds is possible for everyone.

Old school genetics

White Widow, Cheese and Amnesia are well-known and famous all over the world. Their origin lies in Europe and the demand in the market for these old school cultivars is still big and in an upward trend.

White Widow

Good yields, stable quality and feminised as well; these seeds are ready to pop for the novice as well for the expierienced grower.

Autoflower

Autoflowers are in big demand. In general, if you have little planting experience or are looking for quick yields, autoflowering is a good choice for you.

For obvious reasons Euroseeds decided to make the Auto Amnesia.

With a growing demand for more sweet and/or american genetics, the OG Kush Autoflower and the Auto Gelato were created.

Auto Amnesia

Packaging

Euroseeds have packages with 3 seeds and 50 seeds.